Import Stripe Data
When you're already using Stripe and want to start using BillaBear, you'll need to import your existing Stripe data. This guide will walk you through the process step by step.
Prerequisites
Before importing your Stripe data, ensure you have:
- Configured your Stripe API keys in BillaBear
- Administrator access to BillaBear
- A stable internet connection (imports can take time depending on the amount of data)
Required Permissions
To import Stripe data into BillaBear, you need to have an Admin role or higher.
Learn more about user roles here
Understanding the Import Process
The import process transfers your Stripe data to BillaBear in a specific order to maintain data integrity:
- Customers: All your customer records and their details
- Products: Your product catalog
- Prices: All price points associated with your products
- Subscriptions: Active and past subscription records
- Payments: Payment history
- Refunds: Any refunds processed
- Chargebacks: Any chargebacks recorded
This sequential process ensures that all relationships between data are maintained correctly.
Import Duration
The time required for import depends on the volume of your Stripe data:
- Small accounts (hundreds of records): 5-15 minutes
- Medium accounts (thousands of records): 15-60 minutes
- Large accounts (tens of thousands of records): 1-3 hours
You can continue using BillaBear during the import process.
Step-by-Step Import Guide
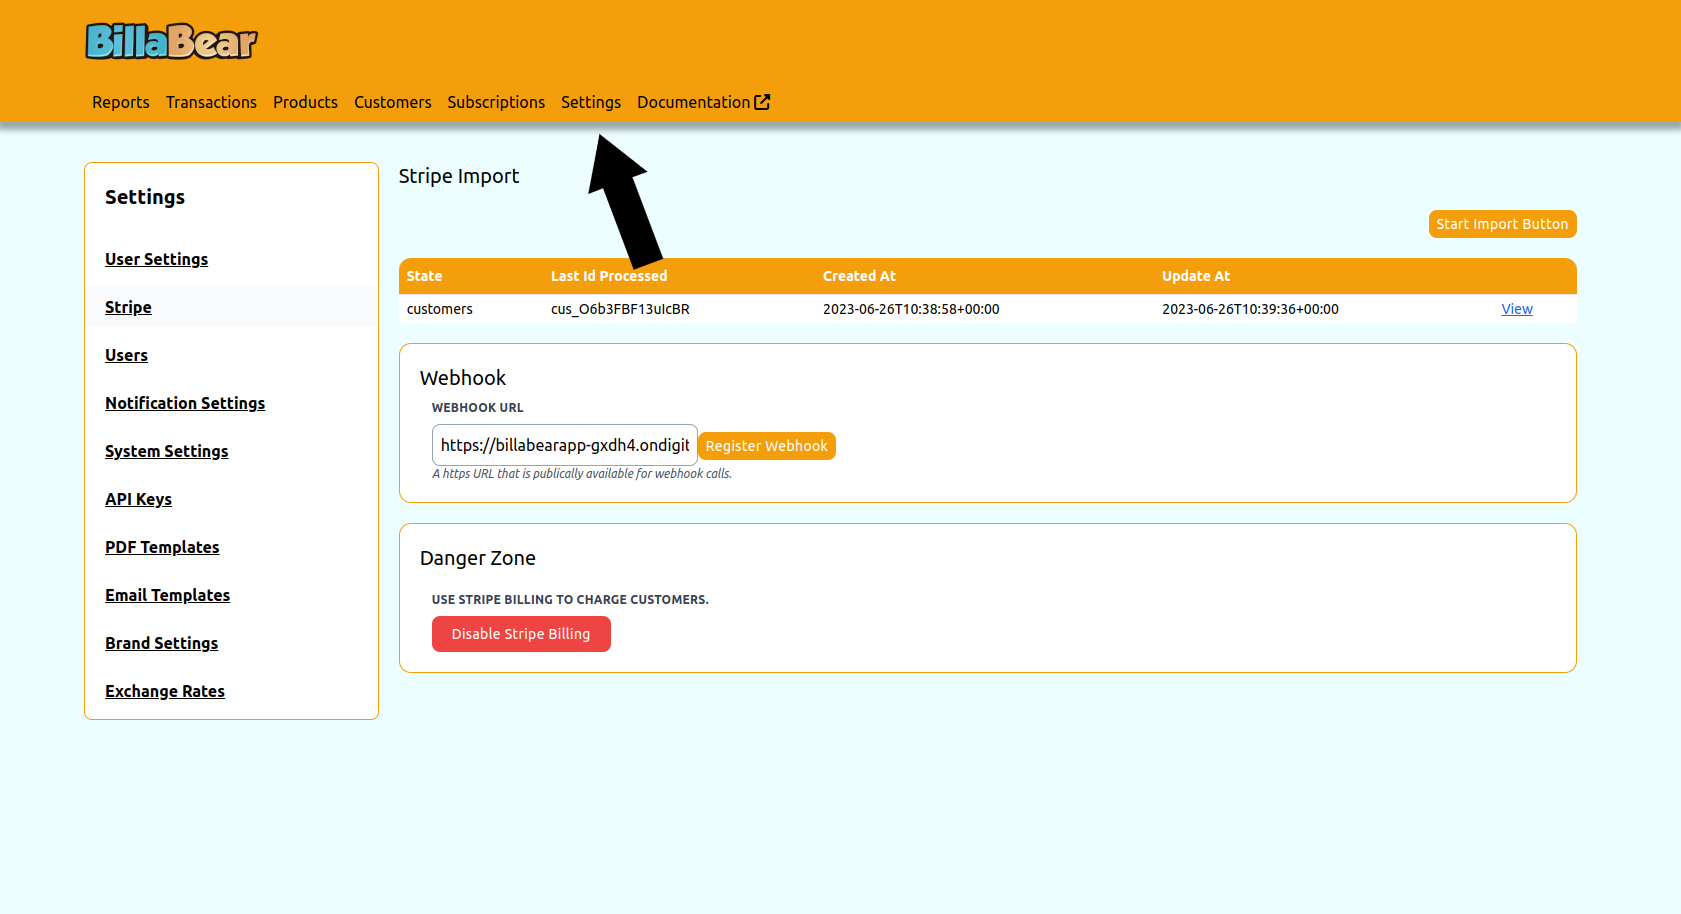
Step 1: Access Settings
From the BillaBear dashboard, click on the Settings option in the main navigation menu.
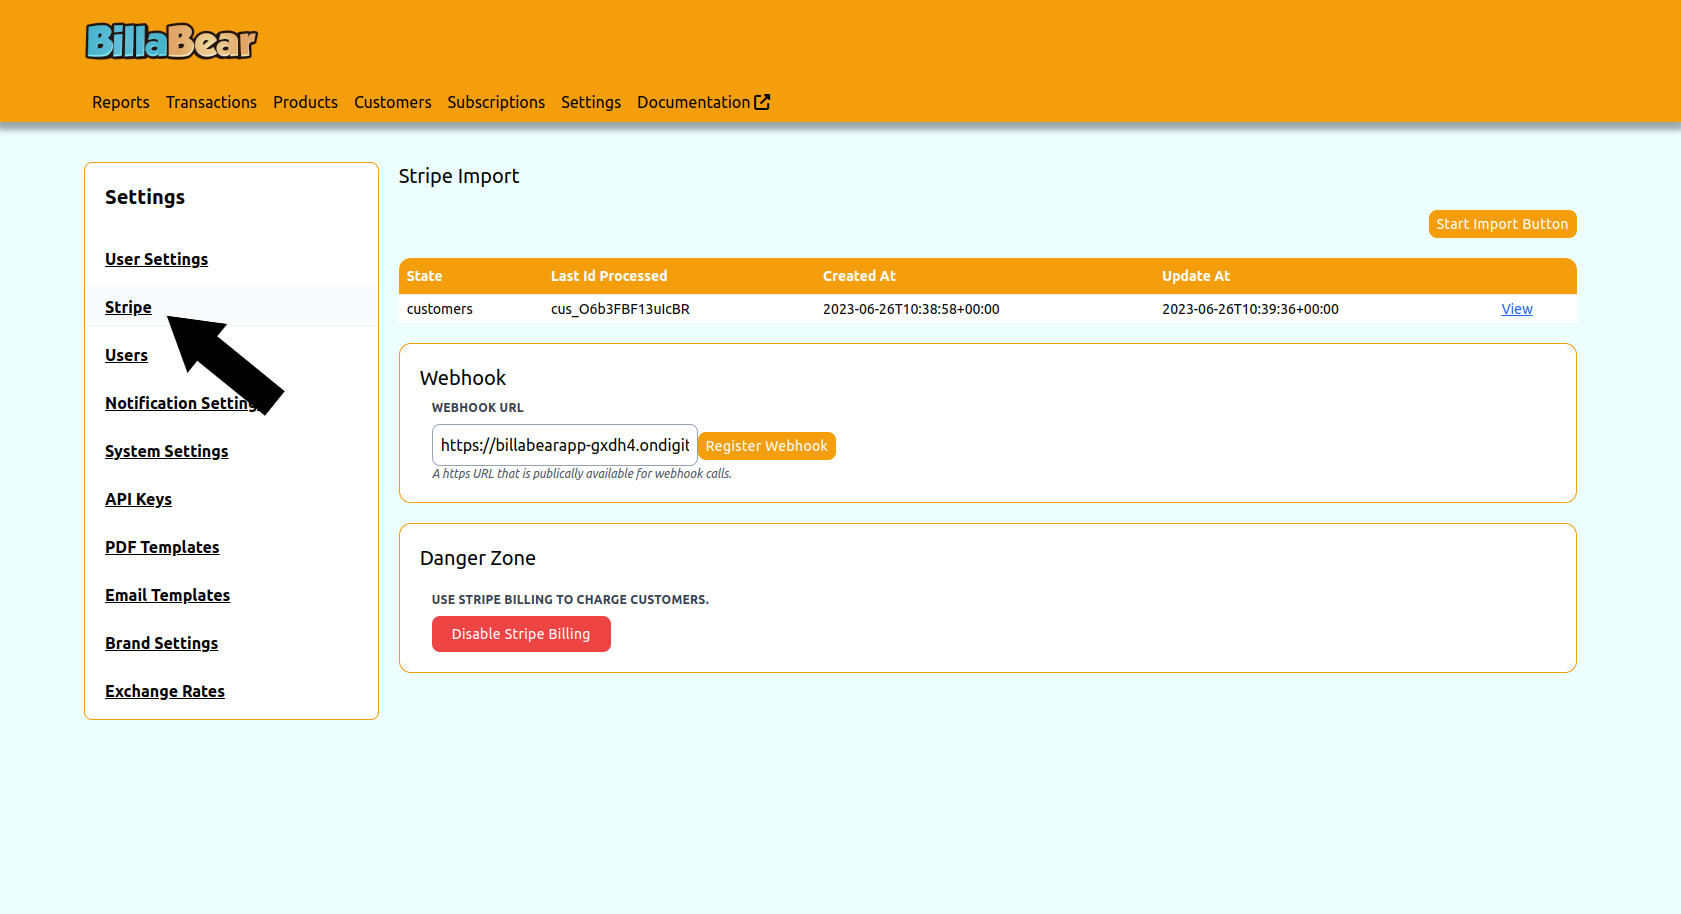
Step 2: Navigate to Stripe Settings
In the Settings menu, locate and click on the Stripe option.
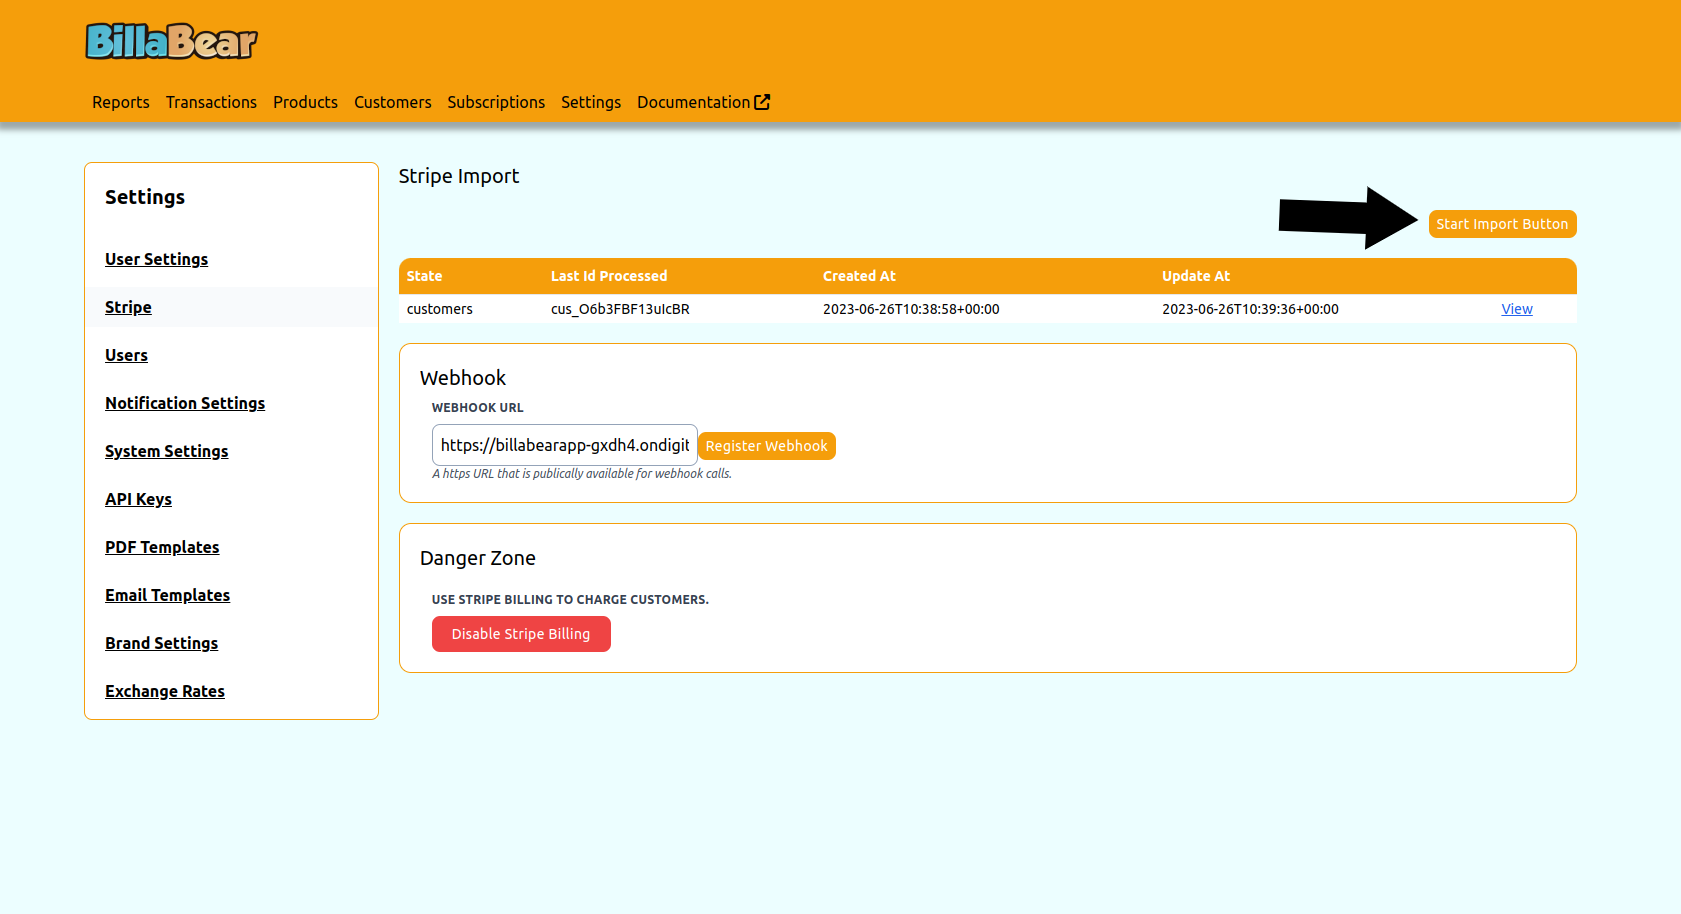
Step 3: Start the Import Process
On the Stripe settings page, locate the Import section and click the Start button to begin the import process.
Step 4: View Import Progress
After starting the import, click the View button to monitor the progress.
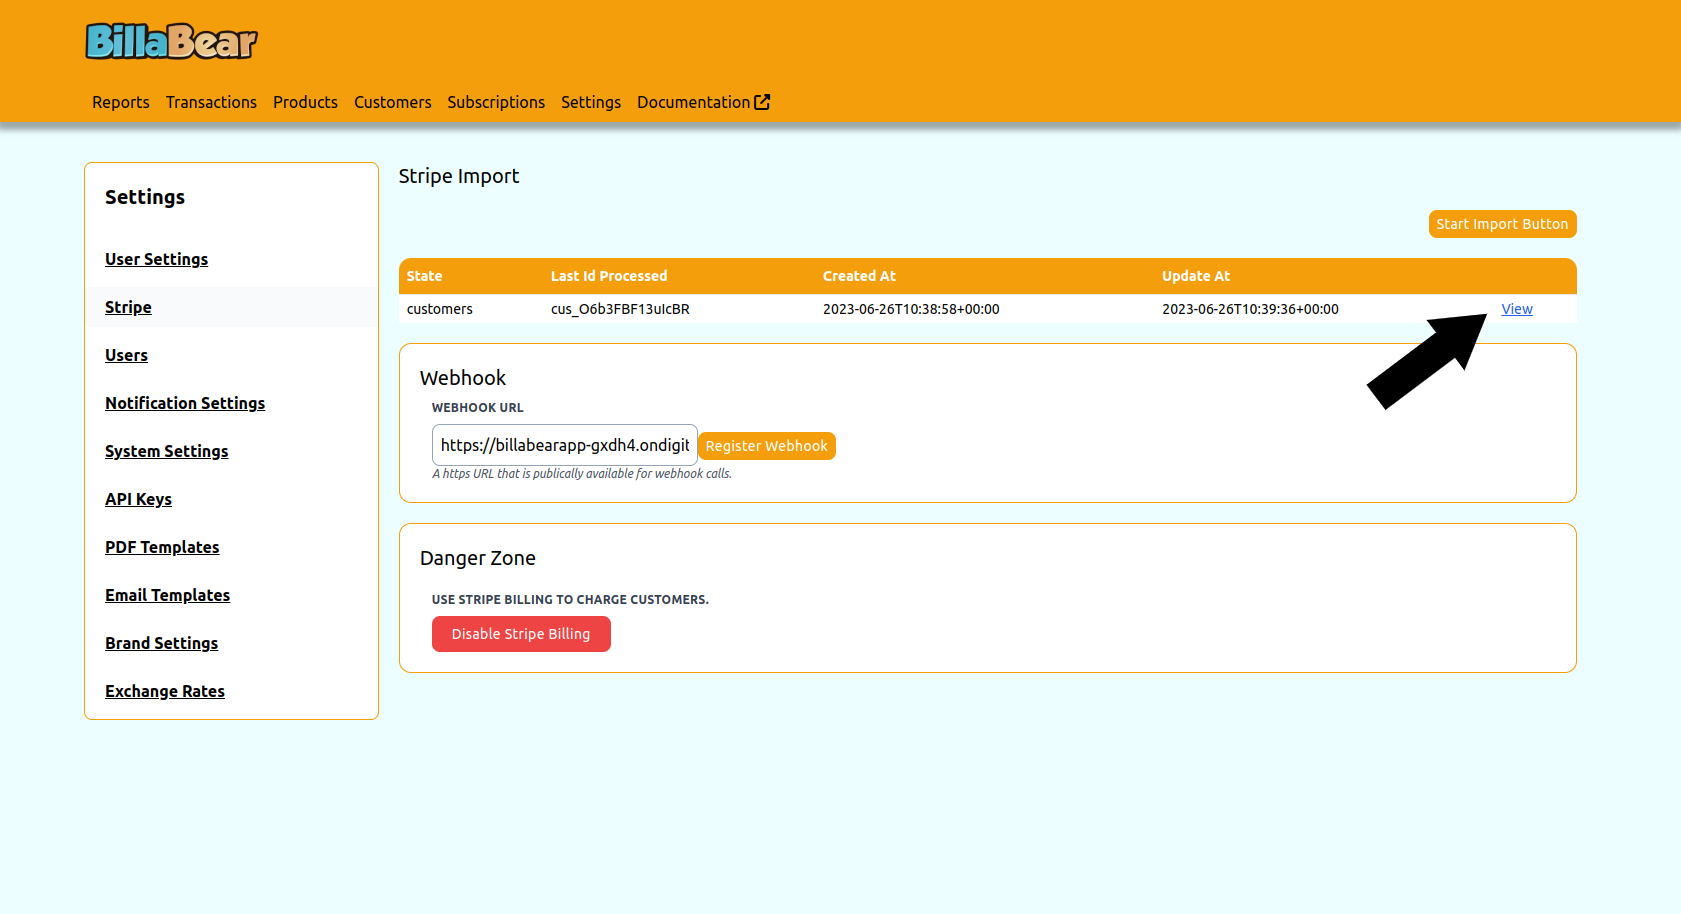
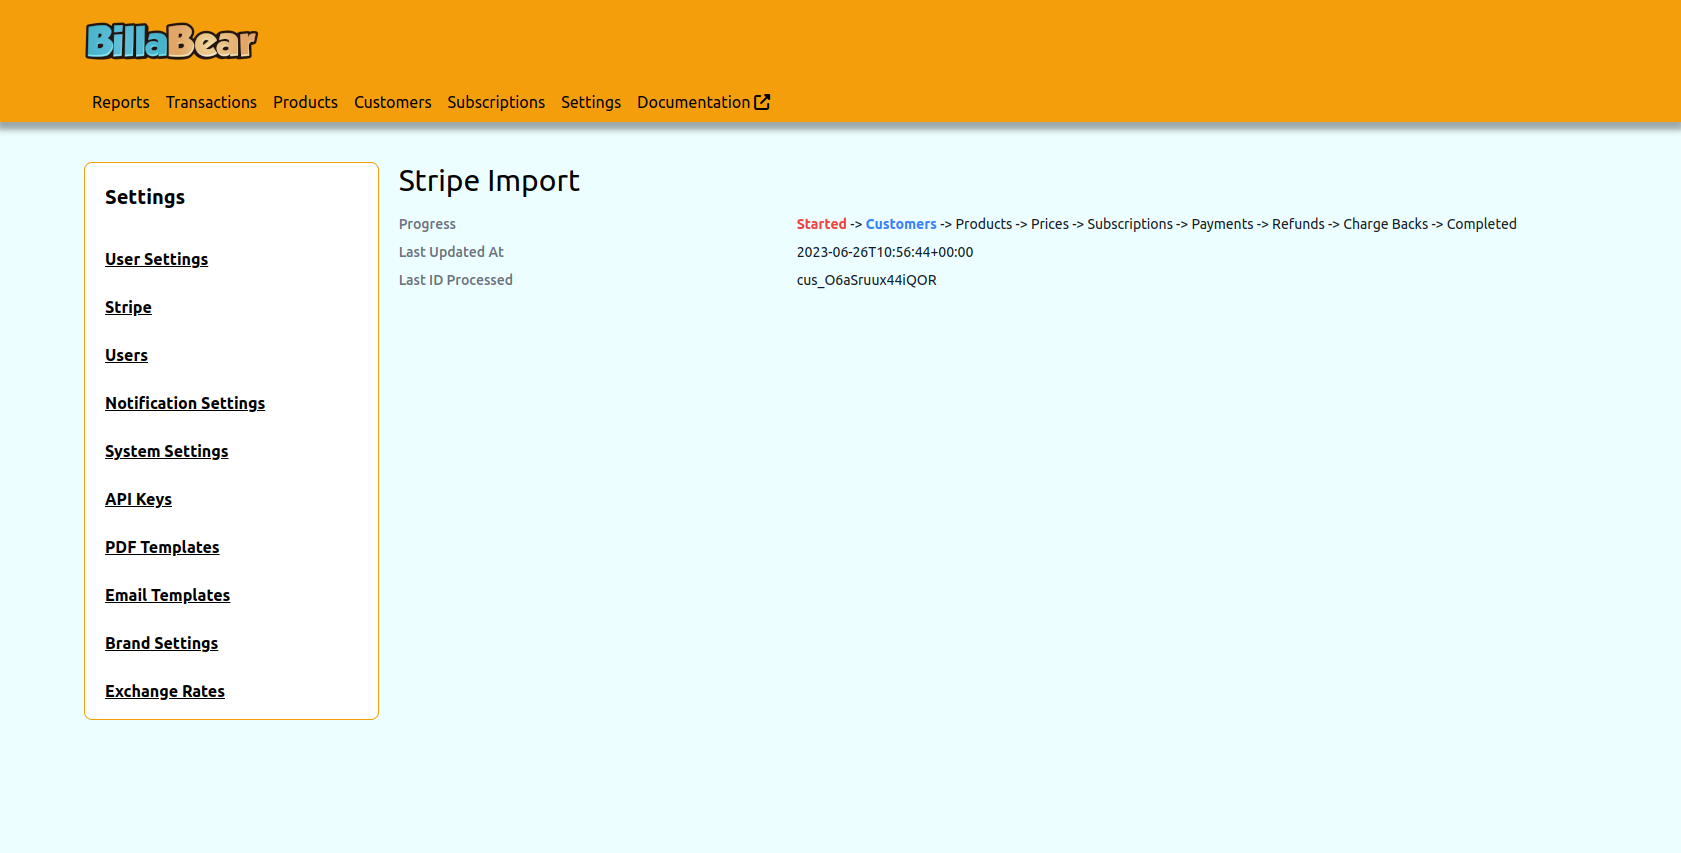
Step 5: Monitor Import Progress
The progress screen shows you which data types have been imported and which are still in progress. You can leave this page and return later - the import will continue in the background.
After the Import
Once the import is complete:
- Verify Your Data: Check that your customers, products, and subscriptions have been imported correctly
- Set Up Webhooks: Configure webhooks to keep your Stripe and BillaBear data synchronized. See the Webhooks documentation for detailed instructions.
- Configure Additional Settings: Set up any BillaBear-specific features you want to use
Troubleshooting
If you encounter issues during the import process:
- Import Stops: If the import appears to stop, refresh the page to update the status
- Missing Data: If some data appears to be missing, check the import logs for errors
- Error Messages: Note any error messages and contact support if needed
For persistent issues, you can dismiss the current import and start a new one, or contact BillaBear support for assistance.
For more detailed troubleshooting guidance, see the Troubleshooting documentation.
Limitations
- Historical data older than 2 years might not be imported completely
- Custom metadata from Stripe may require additional configuration
- Stripe Connect accounts require separate imports